Introduction
Wrist pain is one of the most common challenges faced by yoga practitioners, especially in styles that include weight-bearing poses like Downward Dog, Plank, Chaturanga, and arm balances. While yoga is meant to build strength and flexibility, improper alignment, weak muscles, or overuse can lead to discomfort or even injury in the wrists.
This in-depth guide explains why wrist pain happens in yoga and provides 12 practical, expert-backed tips to prevent sore wrists. It is optimized with relevant keywords such as wrist pain in yoga, how to protect wrists in yoga, yoga wrist support, prevent wrist injury yoga, and safe yoga practice tips for better visibility in search and AI overviews.
Understanding Wrist Pain in Yoga
The wrist joint is relatively small but highly complex. It is made up of eight small carpal bones, connected by ligaments, tendons, and soft tissues that allow flexibility and movement. These structures support the hands and enable a wide range of motion, which is essential in yoga.
However, this flexibility also makes the wrists vulnerable. In many yoga poses, the wrists are placed in deep extension (bending backward) while bearing body weight. This combination of pressure and angle can strain the joint, compress nerves, and inflame surrounding tissues.
Another key factor is the carpal tunnel, a narrow passage in the wrist that houses important nerves and tendons. When pressure builds in this area, it can lead to pain, tingling, or numbness in the hands.
Without proper technique and strength, repeated stress on the wrists can result in:
- Inflammation and soreness
- Reduced mobility
- Weak grip strength
- Chronic conditions like tendonitis or carpal tunnel syndrome
Understanding this anatomy helps you practice more mindfully and avoid unnecessary strain.
Sore Wrists Are a Warning Sign
Wrist pain should never be ignored. It is your body’s way of signaling that something is off—whether it is poor alignment, lack of strength, or overuse.
If you experience soreness after a yoga session, it is important to:
- Pause your practice until the pain subsides
- Apply rest, ice, and elevation to reduce inflammation
- Avoid repeating movements that caused discomfort
- Consider supportive gear like wrist wraps if needed
Continuing to practice through pain can worsen the condition and lead to long-term injury. If pain persists or becomes severe, consulting a doctor or physical therapist is strongly recommended.
12 Tips to Prevent Wrist Pain in Yoga
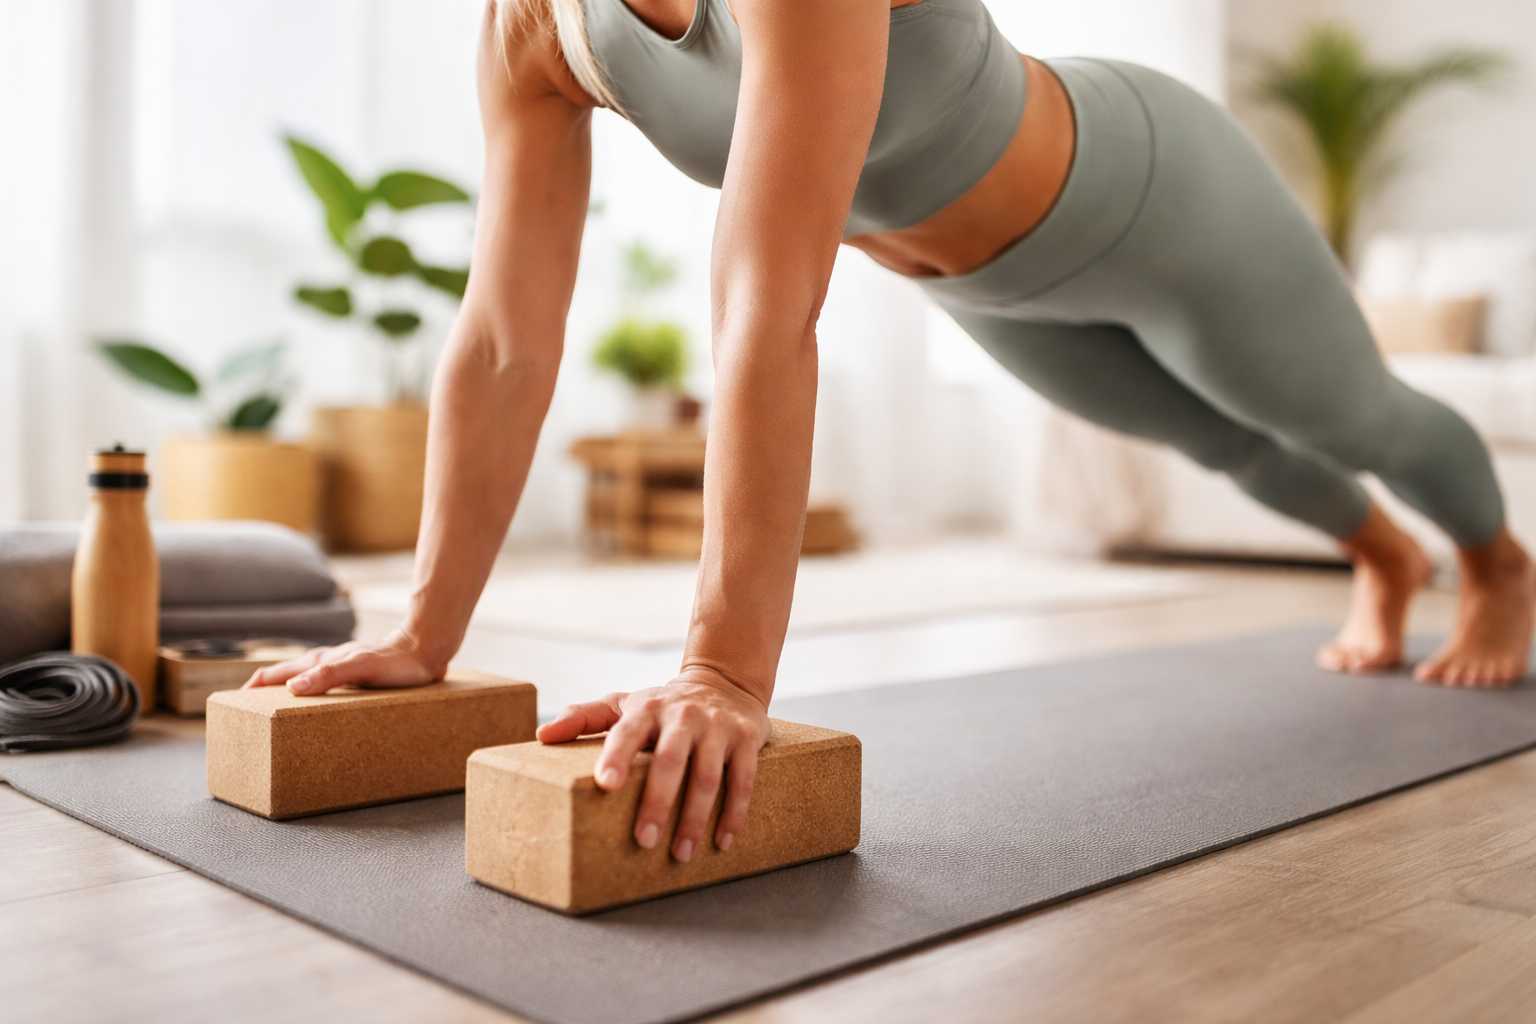
1. Bring the Ground to You
Instead of forcing your body to adapt to the floor, modify your environment. Using props like yoga blocks, wedges, or even a sturdy chair can elevate your hands and reduce the angle of wrist extension.
By raising your hands, you naturally shift more weight into your legs and core, relieving pressure from your wrists. This is especially helpful in poses like Downward Dog, where excessive weight often falls onto the hands.
2. Use Your Fists or Forearms
If wrist extension is causing discomfort, switching to fists or forearms can make a significant difference. This modification keeps the wrist in a neutral position, reducing strain.
For example, replacing Downward Dog with Dolphin Pose allows you to maintain the benefits of the posture while protecting your wrists. Similarly, Plank can be performed on forearms instead of palms.
3. Bend Your Knees to Reduce Load
In poses like Plank or Downward Dog, many practitioners unknowingly place too much weight on their hands. Bending your knees or lowering them to the mat reduces this load and makes it easier to redistribute weight throughout your body.
This adjustment is particularly helpful for beginners or those building strength.
4. Focus on Proper Alignment
Alignment is one of the most critical factors in preventing wrist pain. In many poses, people tend to shift their shoulders too far forward past their wrists, increasing pressure on the joint.
Instead, aim to stack your shoulders directly over your wrists. This alignment distributes weight more efficiently through your arms and reduces unnecessary strain. Practicing with awareness and occasionally checking your posture can significantly improve your form and prevent injury.
5. Engage Hasta Bandha (Hand Lock)
Hasta Bandha refers to actively engaging your hands by spreading your fingers wide and pressing evenly through your palms, fingertips, and knuckles.
This technique:
- Activates arm muscles
- Distributes weight evenly
- Reduces pressure on the wrists
Although it may feel subtle, this engagement creates a strong foundation and prevents collapsing into the wrists.
6. Warm Up Your Wrists Before Practice
Just like you warm up your spine or legs, your wrists also need preparation before weight-bearing movements.
Simple warm-up exercises include:
- Wrist circles in both directions
- Gentle stretches with fingers pointing forward and backward
- Clenching and releasing fists
Warming up increases blood flow, improves flexibility, and reduces the risk of strain during your practice.
7. Distribute Your Weight Evenly
One of the most common mistakes in yoga is placing too much weight on the base of the palm. Instead, aim to distribute weight evenly across your entire hand.
Focus on:
- Pressing into your fingertips
- Engaging your knuckles
- Lifting slightly through the center of your palm
This balanced distribution minimizes repetitive stress on the wrists and enhances stability.
8. Use Props and Modifications Freely
There is no downside to using props—in fact, they are essential tools for safe and sustainable practice.
Consider:
- Placing a knee down in Side Plank
- Using blocks under your hands
- Adjusting poses to suit your body
Props allow you to experience the benefits of a pose without risking injury.
9. Improve Shoulder Mobility and Arm Strength
Weak arms and tight shoulders often lead to excessive pressure on the wrists. By improving strength and flexibility in these areas, you can better support your body weight.
Helpful practices include:
- Shoulder-opening stretches
- Strength-building poses like Low Plank and Dolphin
- Resistance exercises such as squeezing a stress ball
A stronger upper body reduces the burden placed on your wrists.
10. Practice on a Firm, Stable Surface
The surface you practice on can significantly affect wrist comfort. Soft or unstable surfaces like sand or thick carpets can increase strain by forcing your wrists to work harder for stability.
A firm surface, such as a hardwood floor with a supportive yoga mat, provides better alignment and reduces unnecessary pressure.
11. Strengthen Your Core Muscles
Your core plays a major role in supporting your body during yoga. A weak core often results in excessive weight being transferred to the wrists.
Incorporate poses like:
- Boat Pose
- Warrior III
- Plank variations
A strong core helps distribute weight evenly and prevents overloading your hands.
12. Listen to Your Body and Progress Gradually
One of the biggest causes of wrist injury is pushing too hard, too soon. Advanced poses require time, strength, and proper technique.
Always:
- Respect your limits
- Avoid pain during practice
- Progress gradually
If something feels wrong, modify the pose or stop altogether. Yoga is about awareness, not force.
Practice Mindfully for Pain-Free Wrists
Wrist pain in yoga is often preventable with the right approach. By focusing on alignment, strength, flexibility, and mindful movement, you can protect your wrists and enjoy a safe, sustainable practice.
Your foundation—hands, wrists, and arms—supports your entire body in many poses. Taking care of them ensures long-term progress and prevents setbacks.
If you have a pre-existing condition like carpal tunnel syndrome or a recent injury, always consult a healthcare professional before continuing your practice. Even mild discomfort should be approached with caution and awareness.
Conclusion
Wrist pain in yoga is a common yet preventable issue that often stems from poor alignment, lack of strength, or overloading the joints in weight-bearing poses. While yoga is meant to enhance flexibility, strength, and overall well-being, practicing without proper awareness can lead to discomfort and injury—especially in delicate areas like the wrists.
The key to a pain-free yoga journey lies in mindful practice and smart modifications. By focusing on correct alignment, engaging your hands properly, strengthening your core and upper body, and using props when needed, you can significantly reduce strain on your wrists. Small adjustments—like distributing weight evenly, warming up before practice, and choosing supportive surfaces—can make a big difference in protecting your joints.